

Pods does not store Sumsub share tokens, full tax ids, raw document images, base64 payloads, or address data. Pods stores only a salted tax-id hash and its last four digits, plus the status fields and provider ids needed for audit and retry.
Supported countries
Pods Ramp is live today for Brazil and expanding to more countries in Latin America.Each country integrates with its own local KYC/AML provider behind the scenes (Avenia for Brazil) and its own Sumsub reusable-identity partner. Confirm with Pods which partner and required verification fields apply to your target country before configuring the Sumsub level below.
KYC requirements
Every Pods Ramp identity flow verifies the same four things before a user can be approved. Liveness, document, and address are enforced entirely inside Sumsub as part of the level configured in step 1; the tax id is the only one of the four that your backend also sends directly to Pods.Architecture overview
1
Pods provisions your access
Pods sends your server-to-server API key, API base URL, a partner token for the local KYC/AML provider, and its recipient client id.
2
Configure Sumsub
Add the local provider as a reusable identity recipient in Sumsub and configure a verification level with the fields that provider requires.
3
Run Sumsub WebSDK
The user completes identity verification through Sumsub WebSDK in your app.
4
Submit to Pods
Your backend generates a fresh Sumsub share token and submits it to Pods.
5
Poll Ramp status
When the Pods status becomes
approved, the user is approved for the Pods Ramp money movement routes enabled in your integration.Before you start
Pods sends you these integration values:The local KYC/AML provider (Avenia for Brazil) has no direct relationship with your company in this flow. Pods manages that relationship internally and gives you the values needed for Sumsub reusable identity sharing.
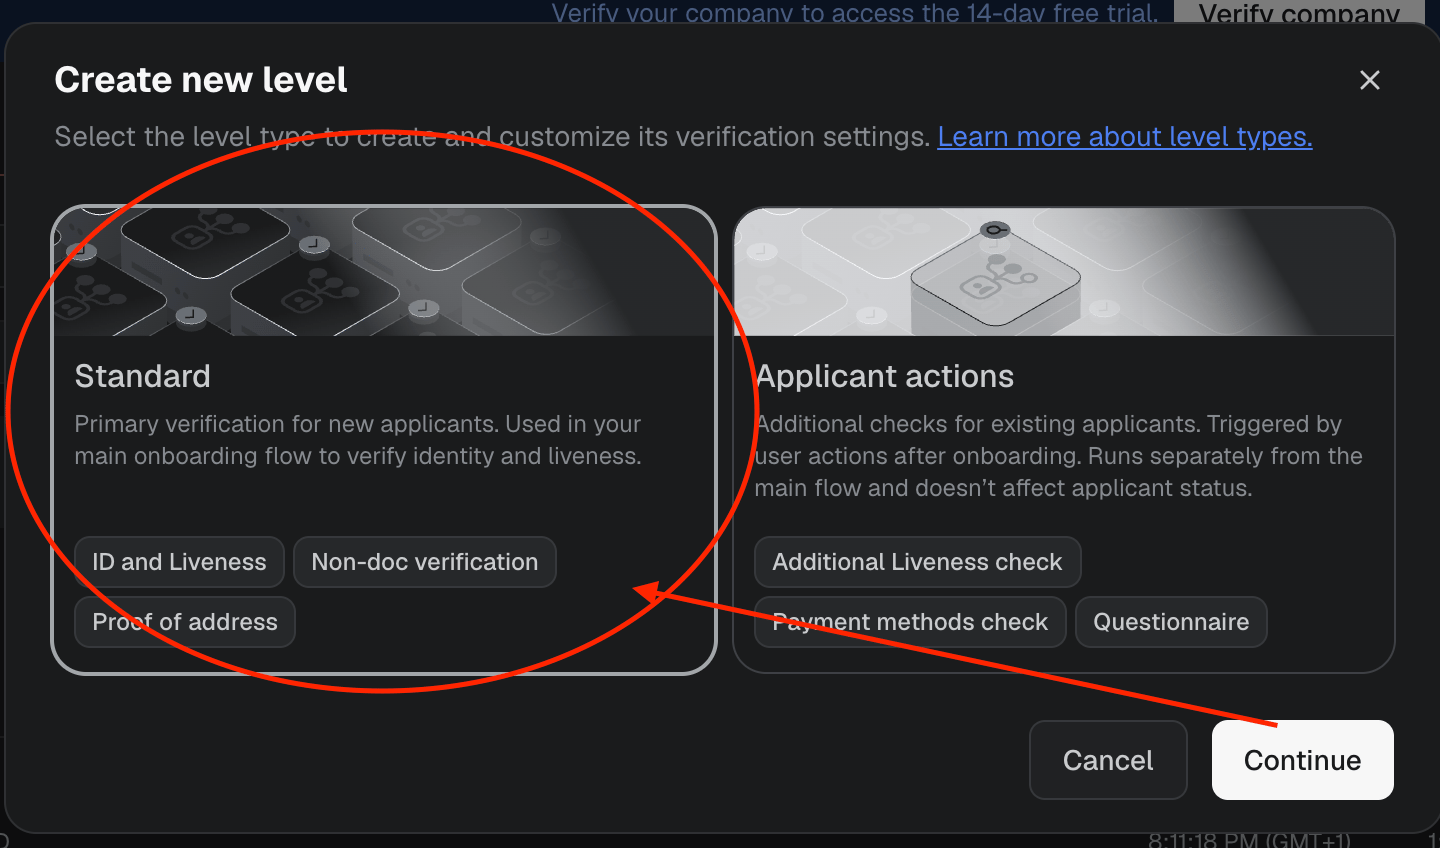
1. Configure the Sumsub level
Create an individual Sumsub verification level named exactly:
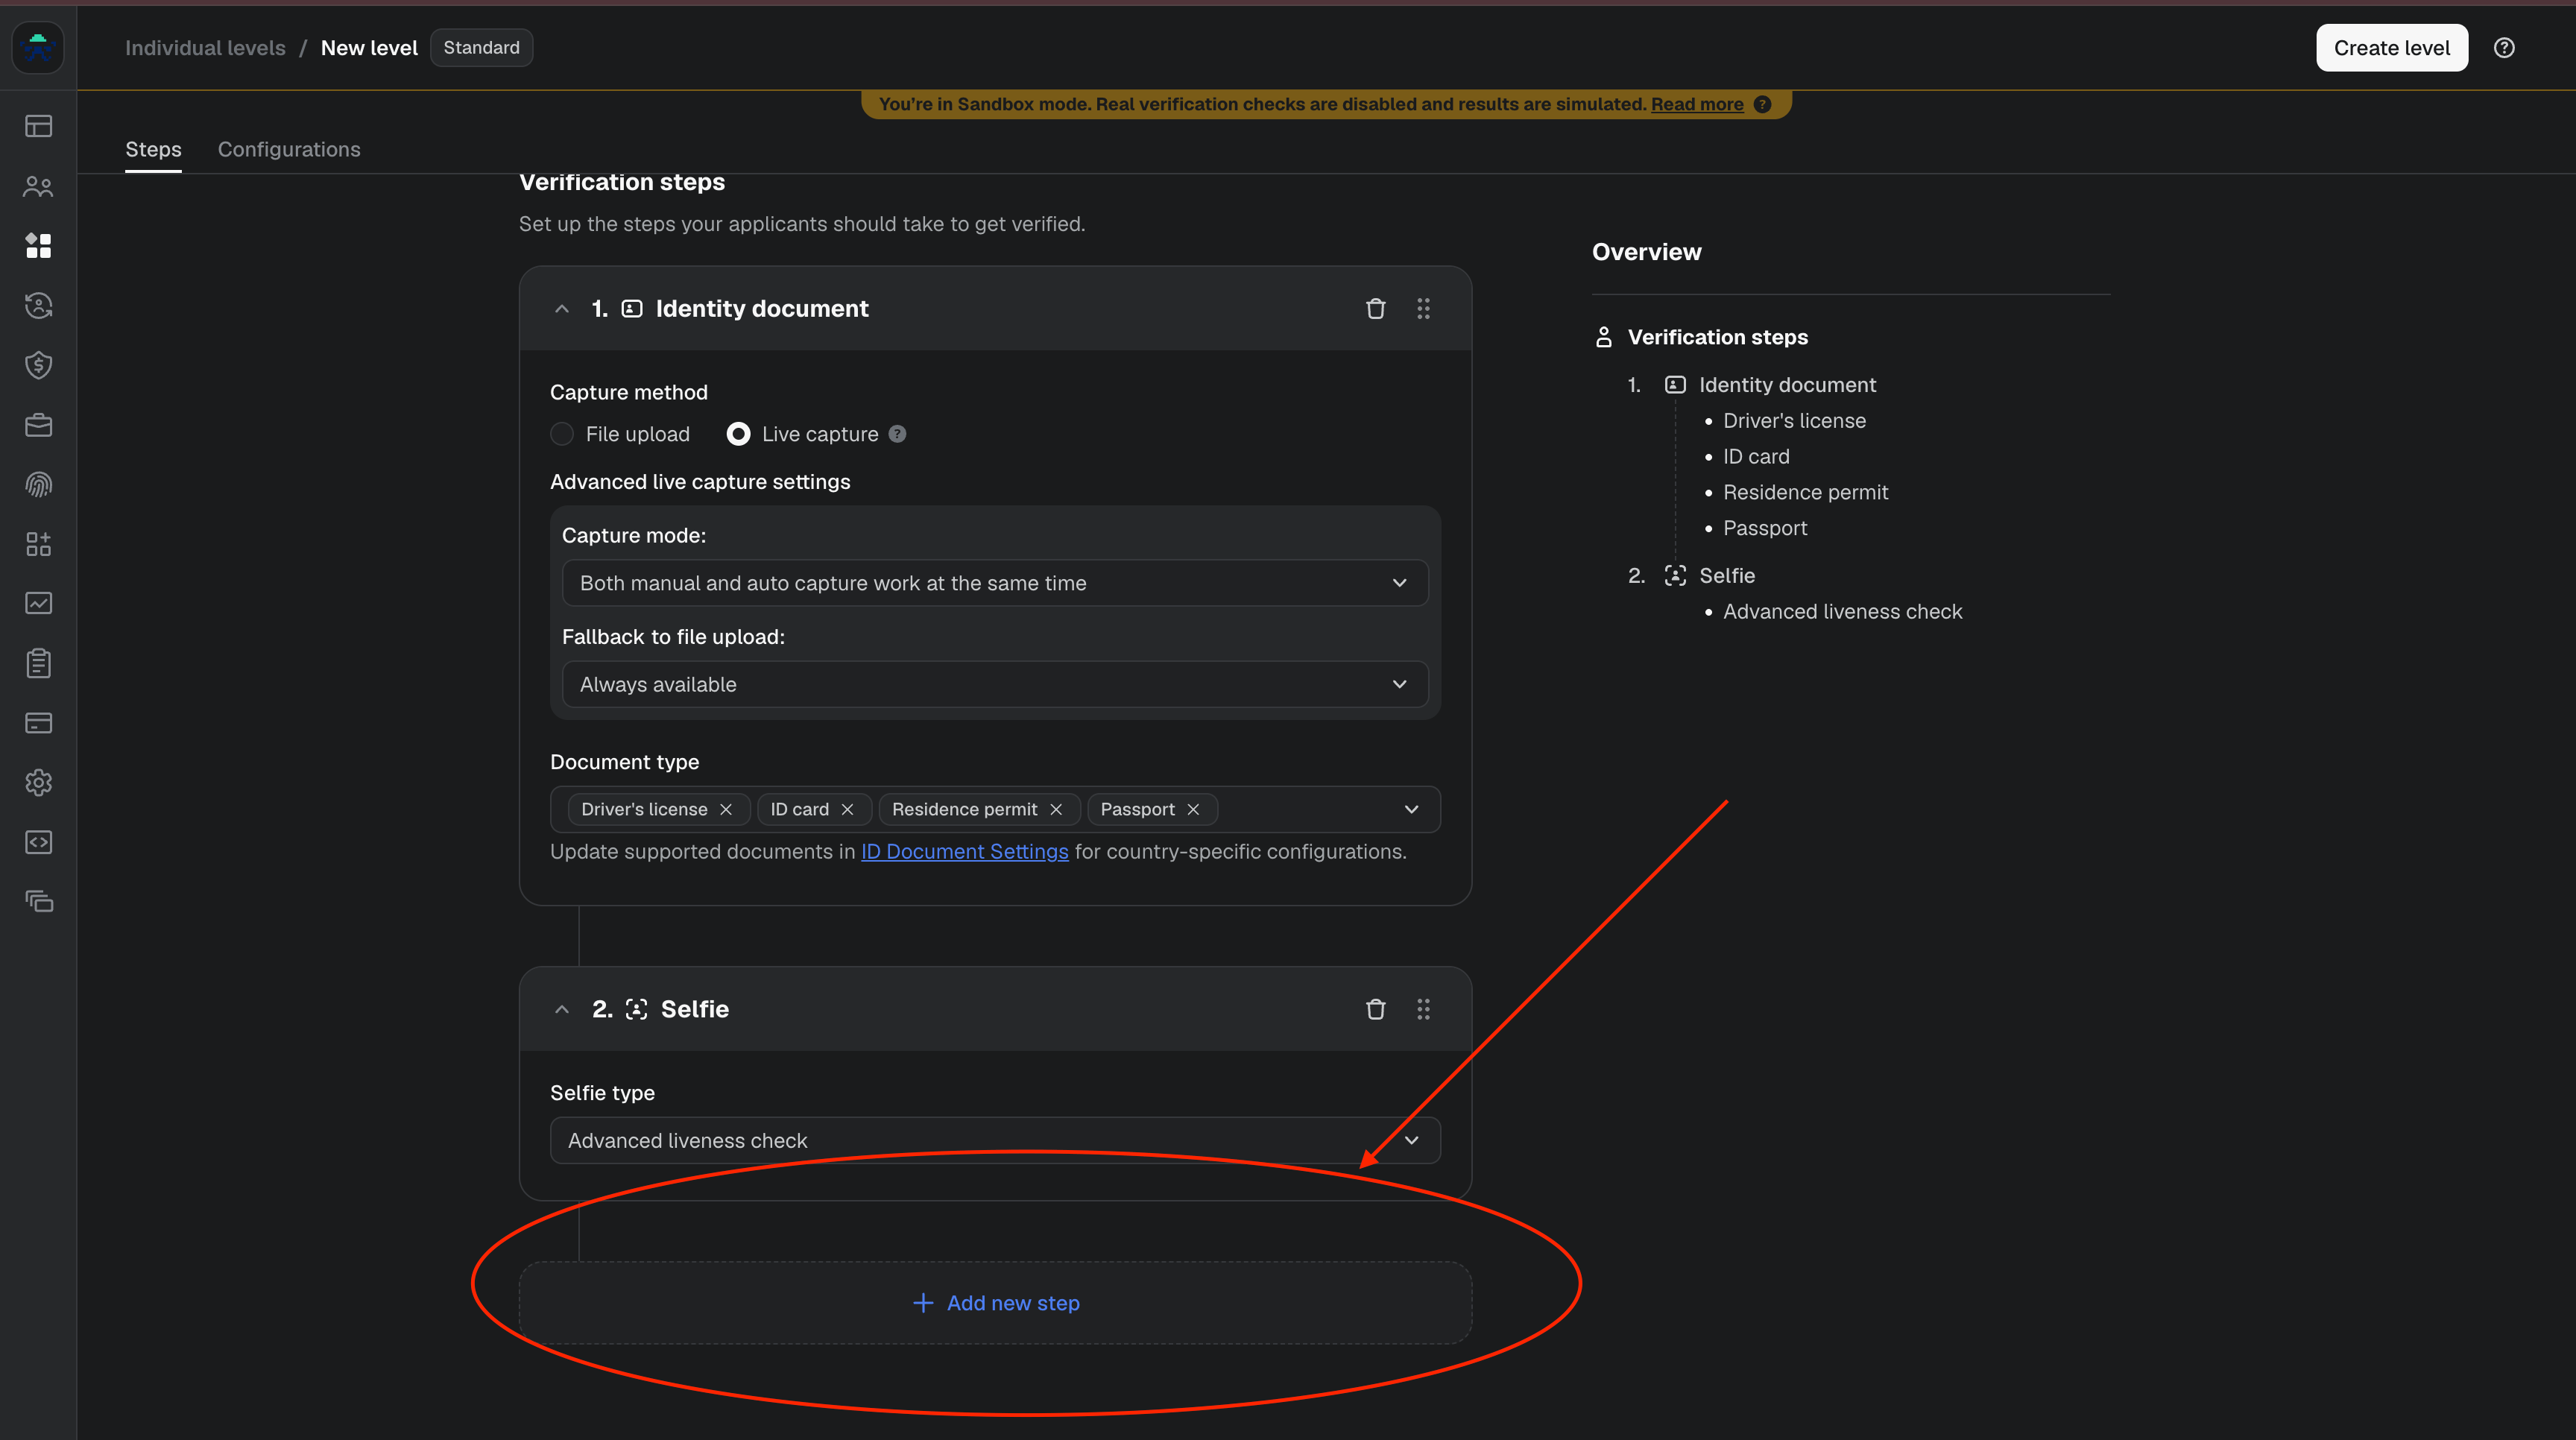
Required Sumsub steps
Add the identity document and selfie steps first.
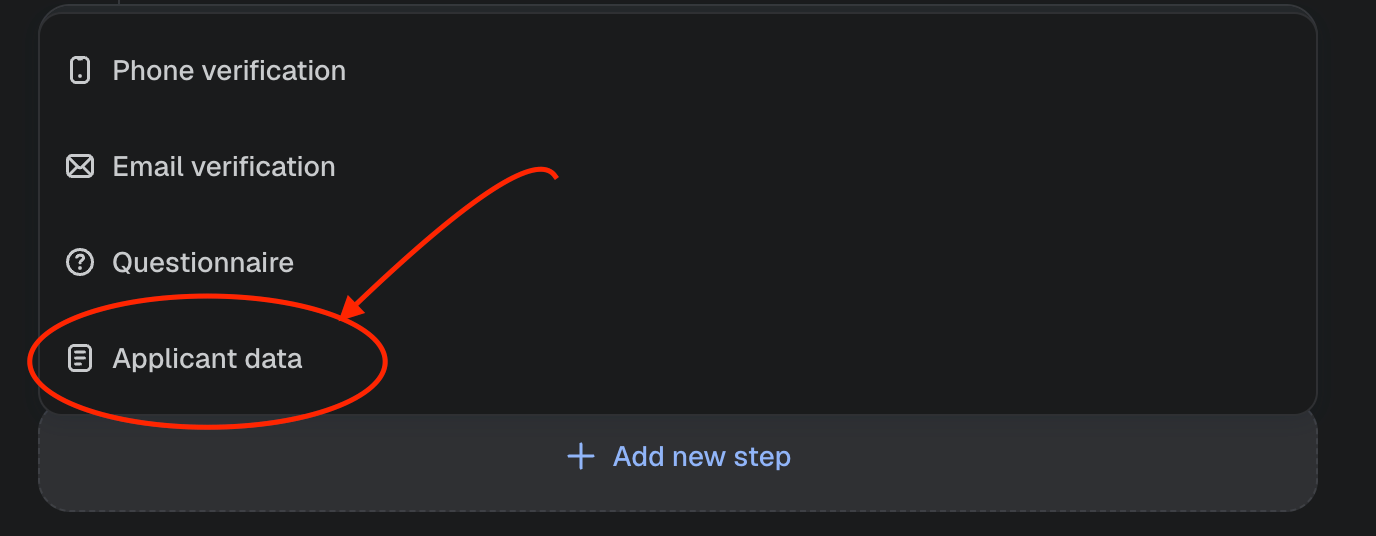
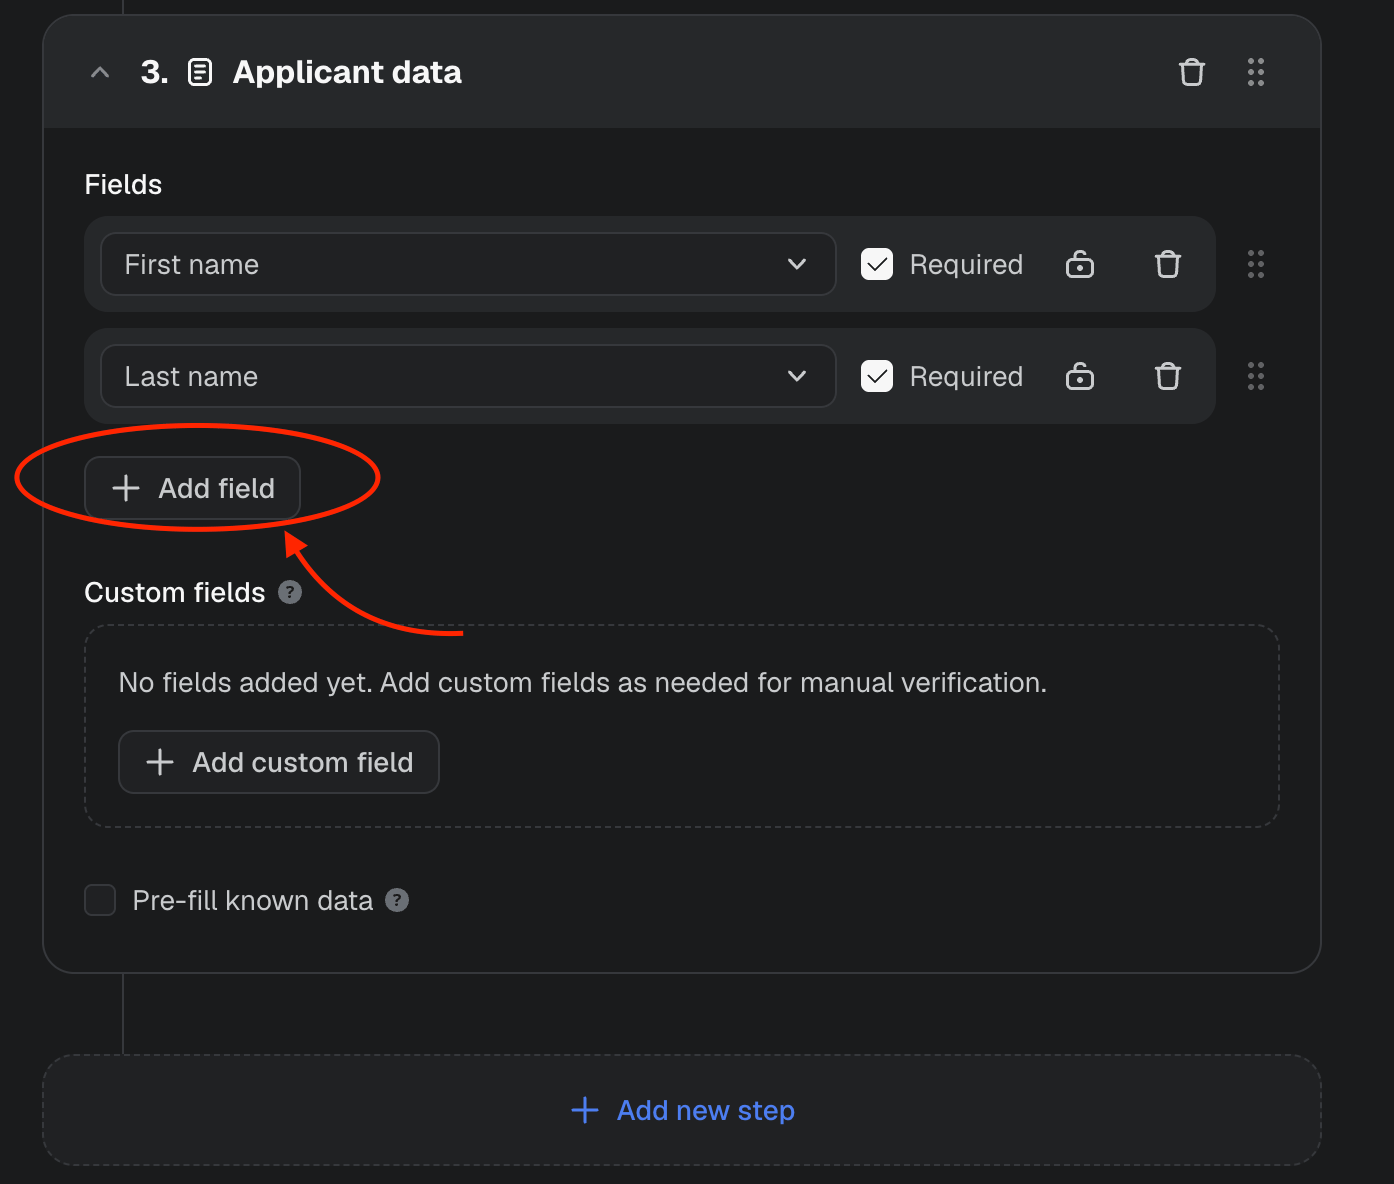
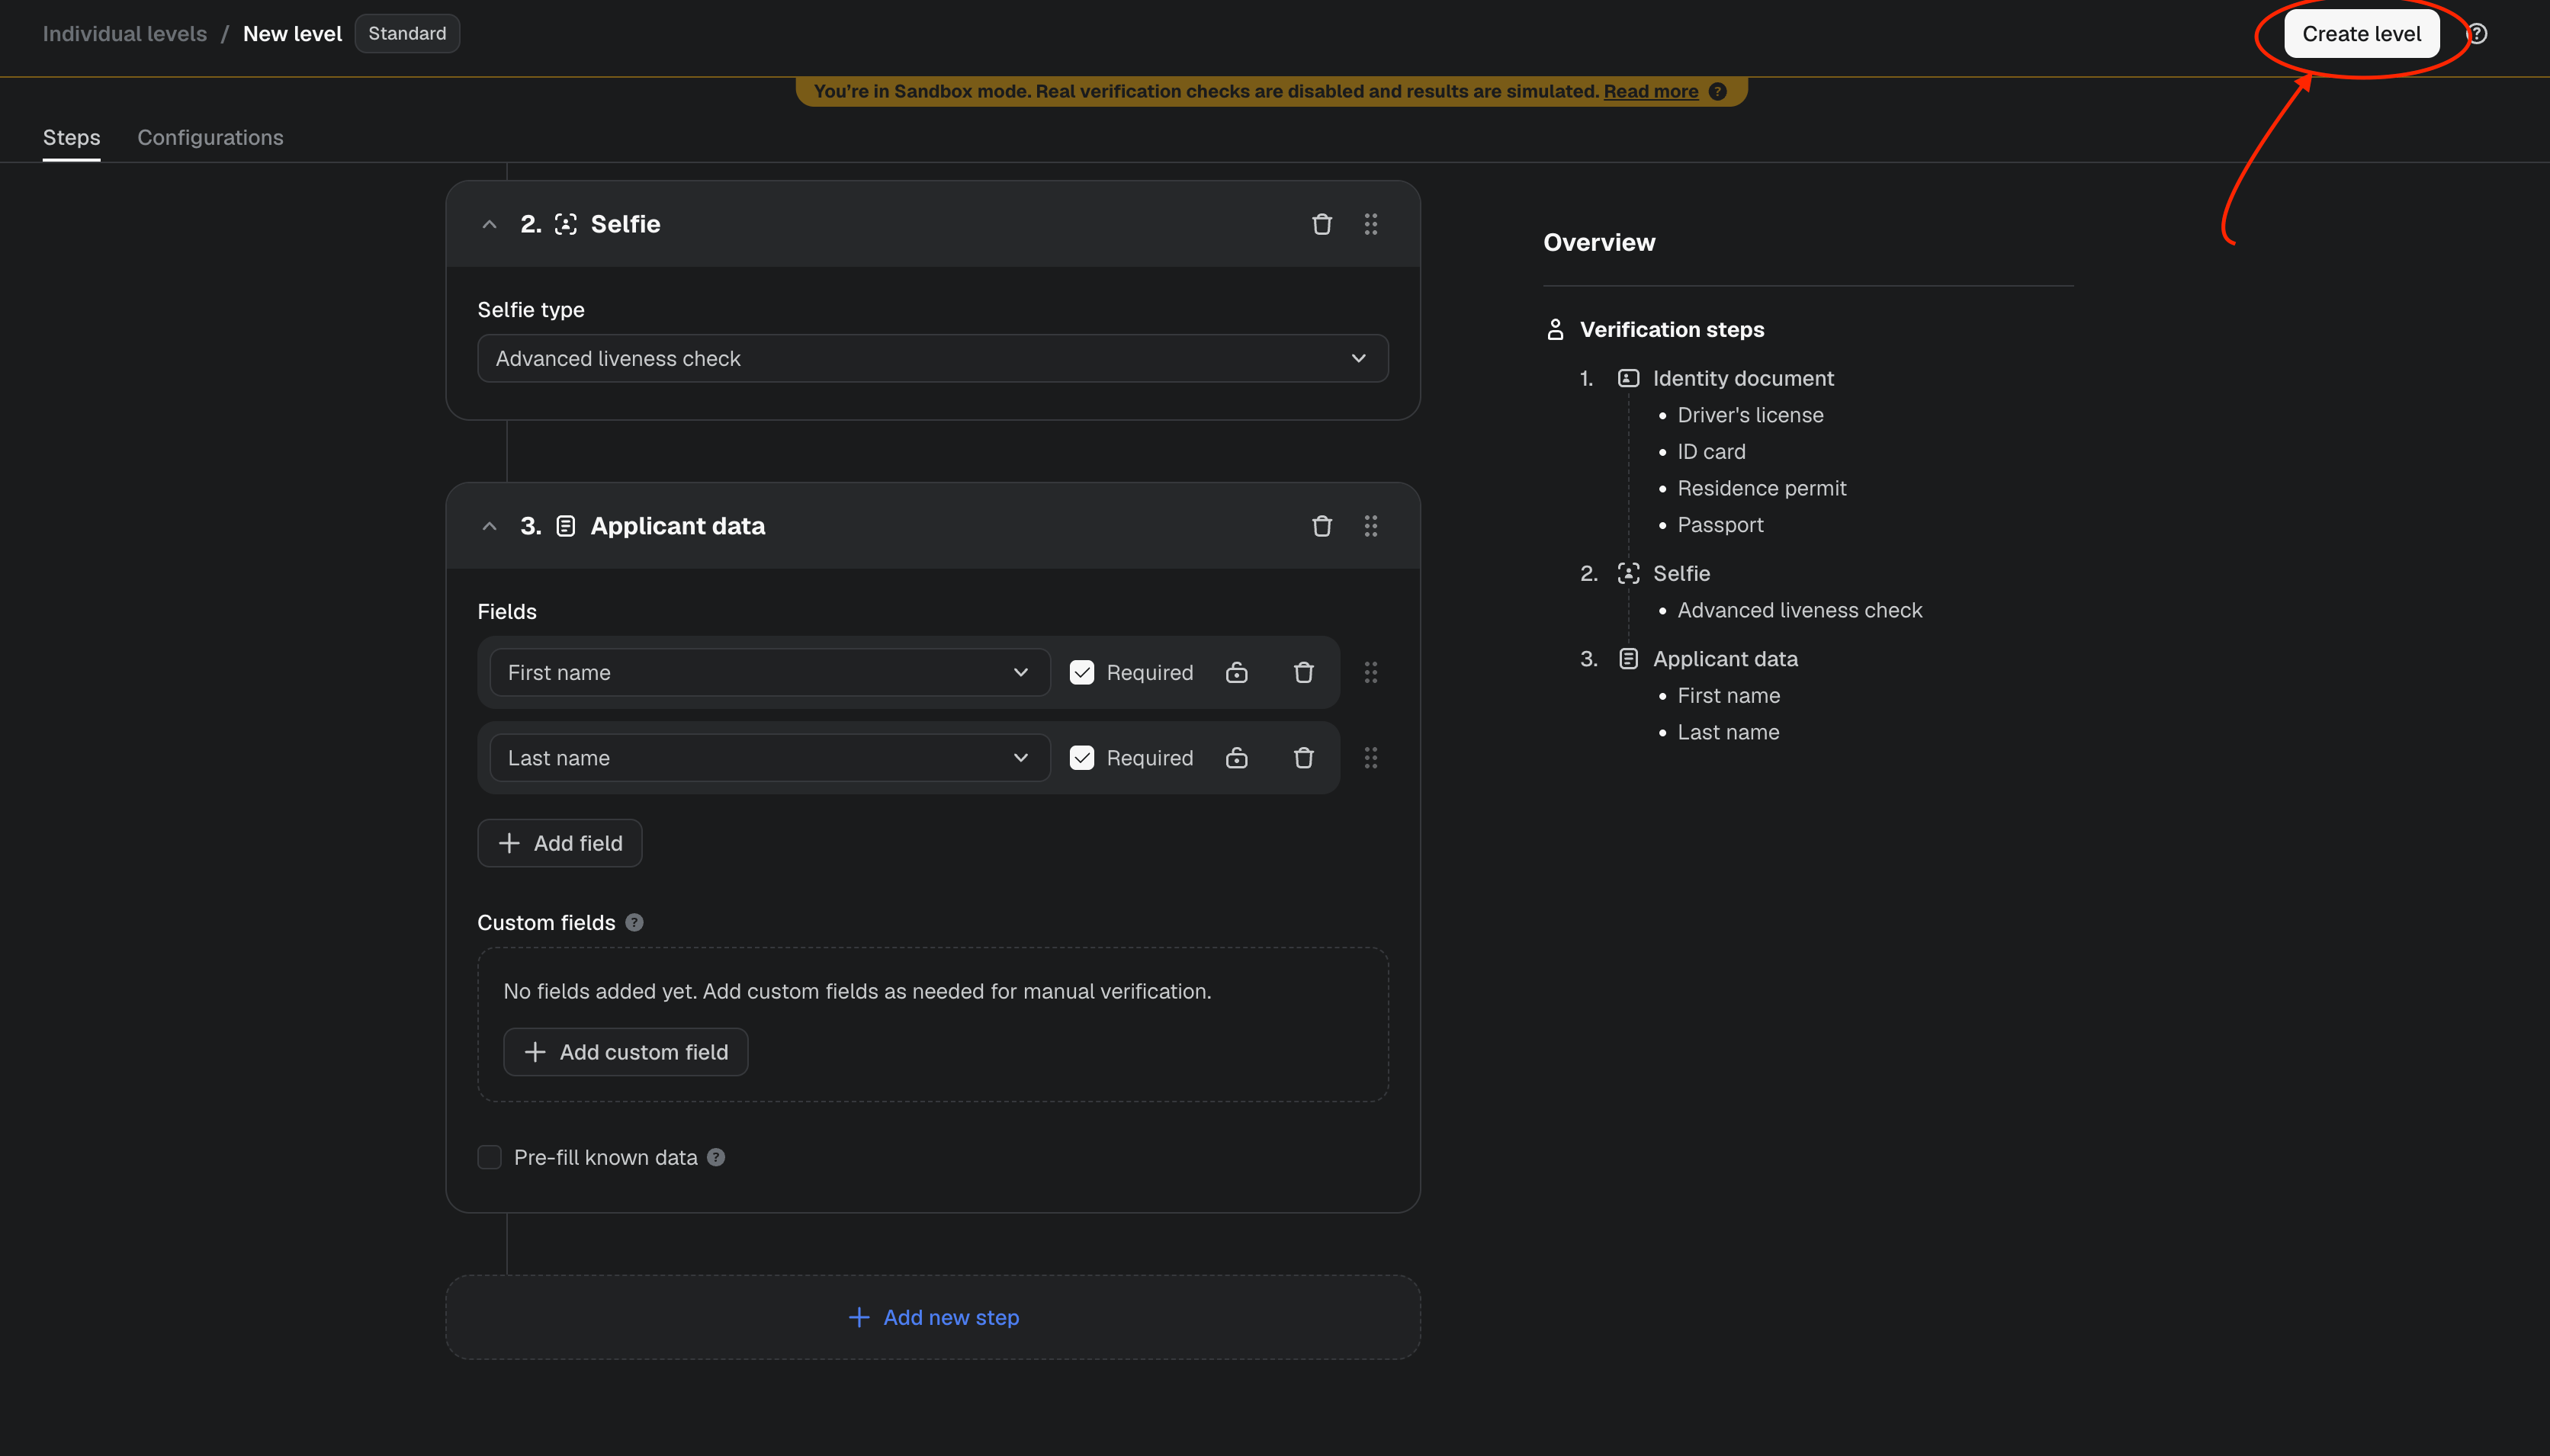
Country-specific requirements
The required tax id, applicant fields, and Sumsub reusable-identity partner differ per country. For Brazil, Avenia requires:- CPF in the Sumsub
TINfield. - Country of Tax ID set to Brazil.
- Full name.
- Date of birth.
- One identity document:
ID_CARD,PASSPORT,DRIVERS, orRESIDENCE_PERMIT. - Sumsub review answer
GREEN.
2. Add the local provider as a reusable identity recipient
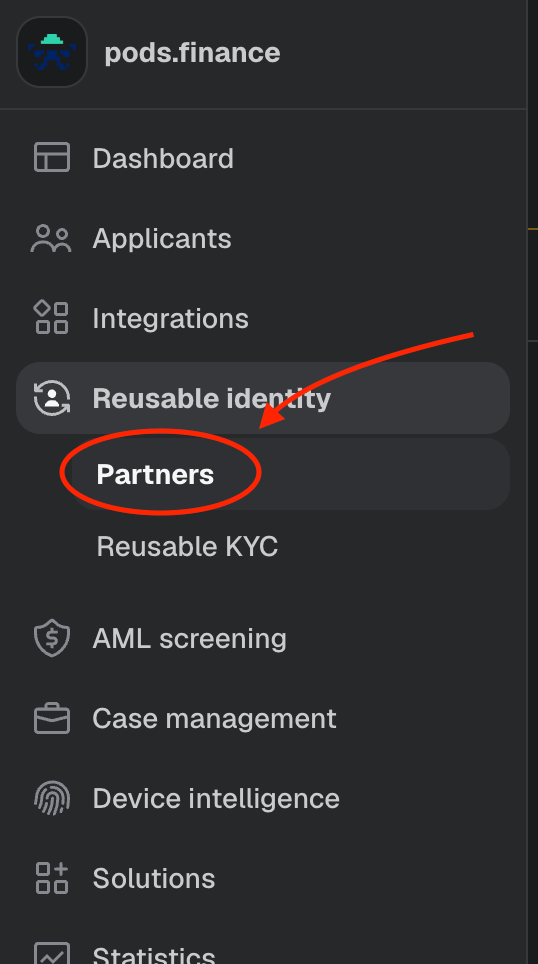
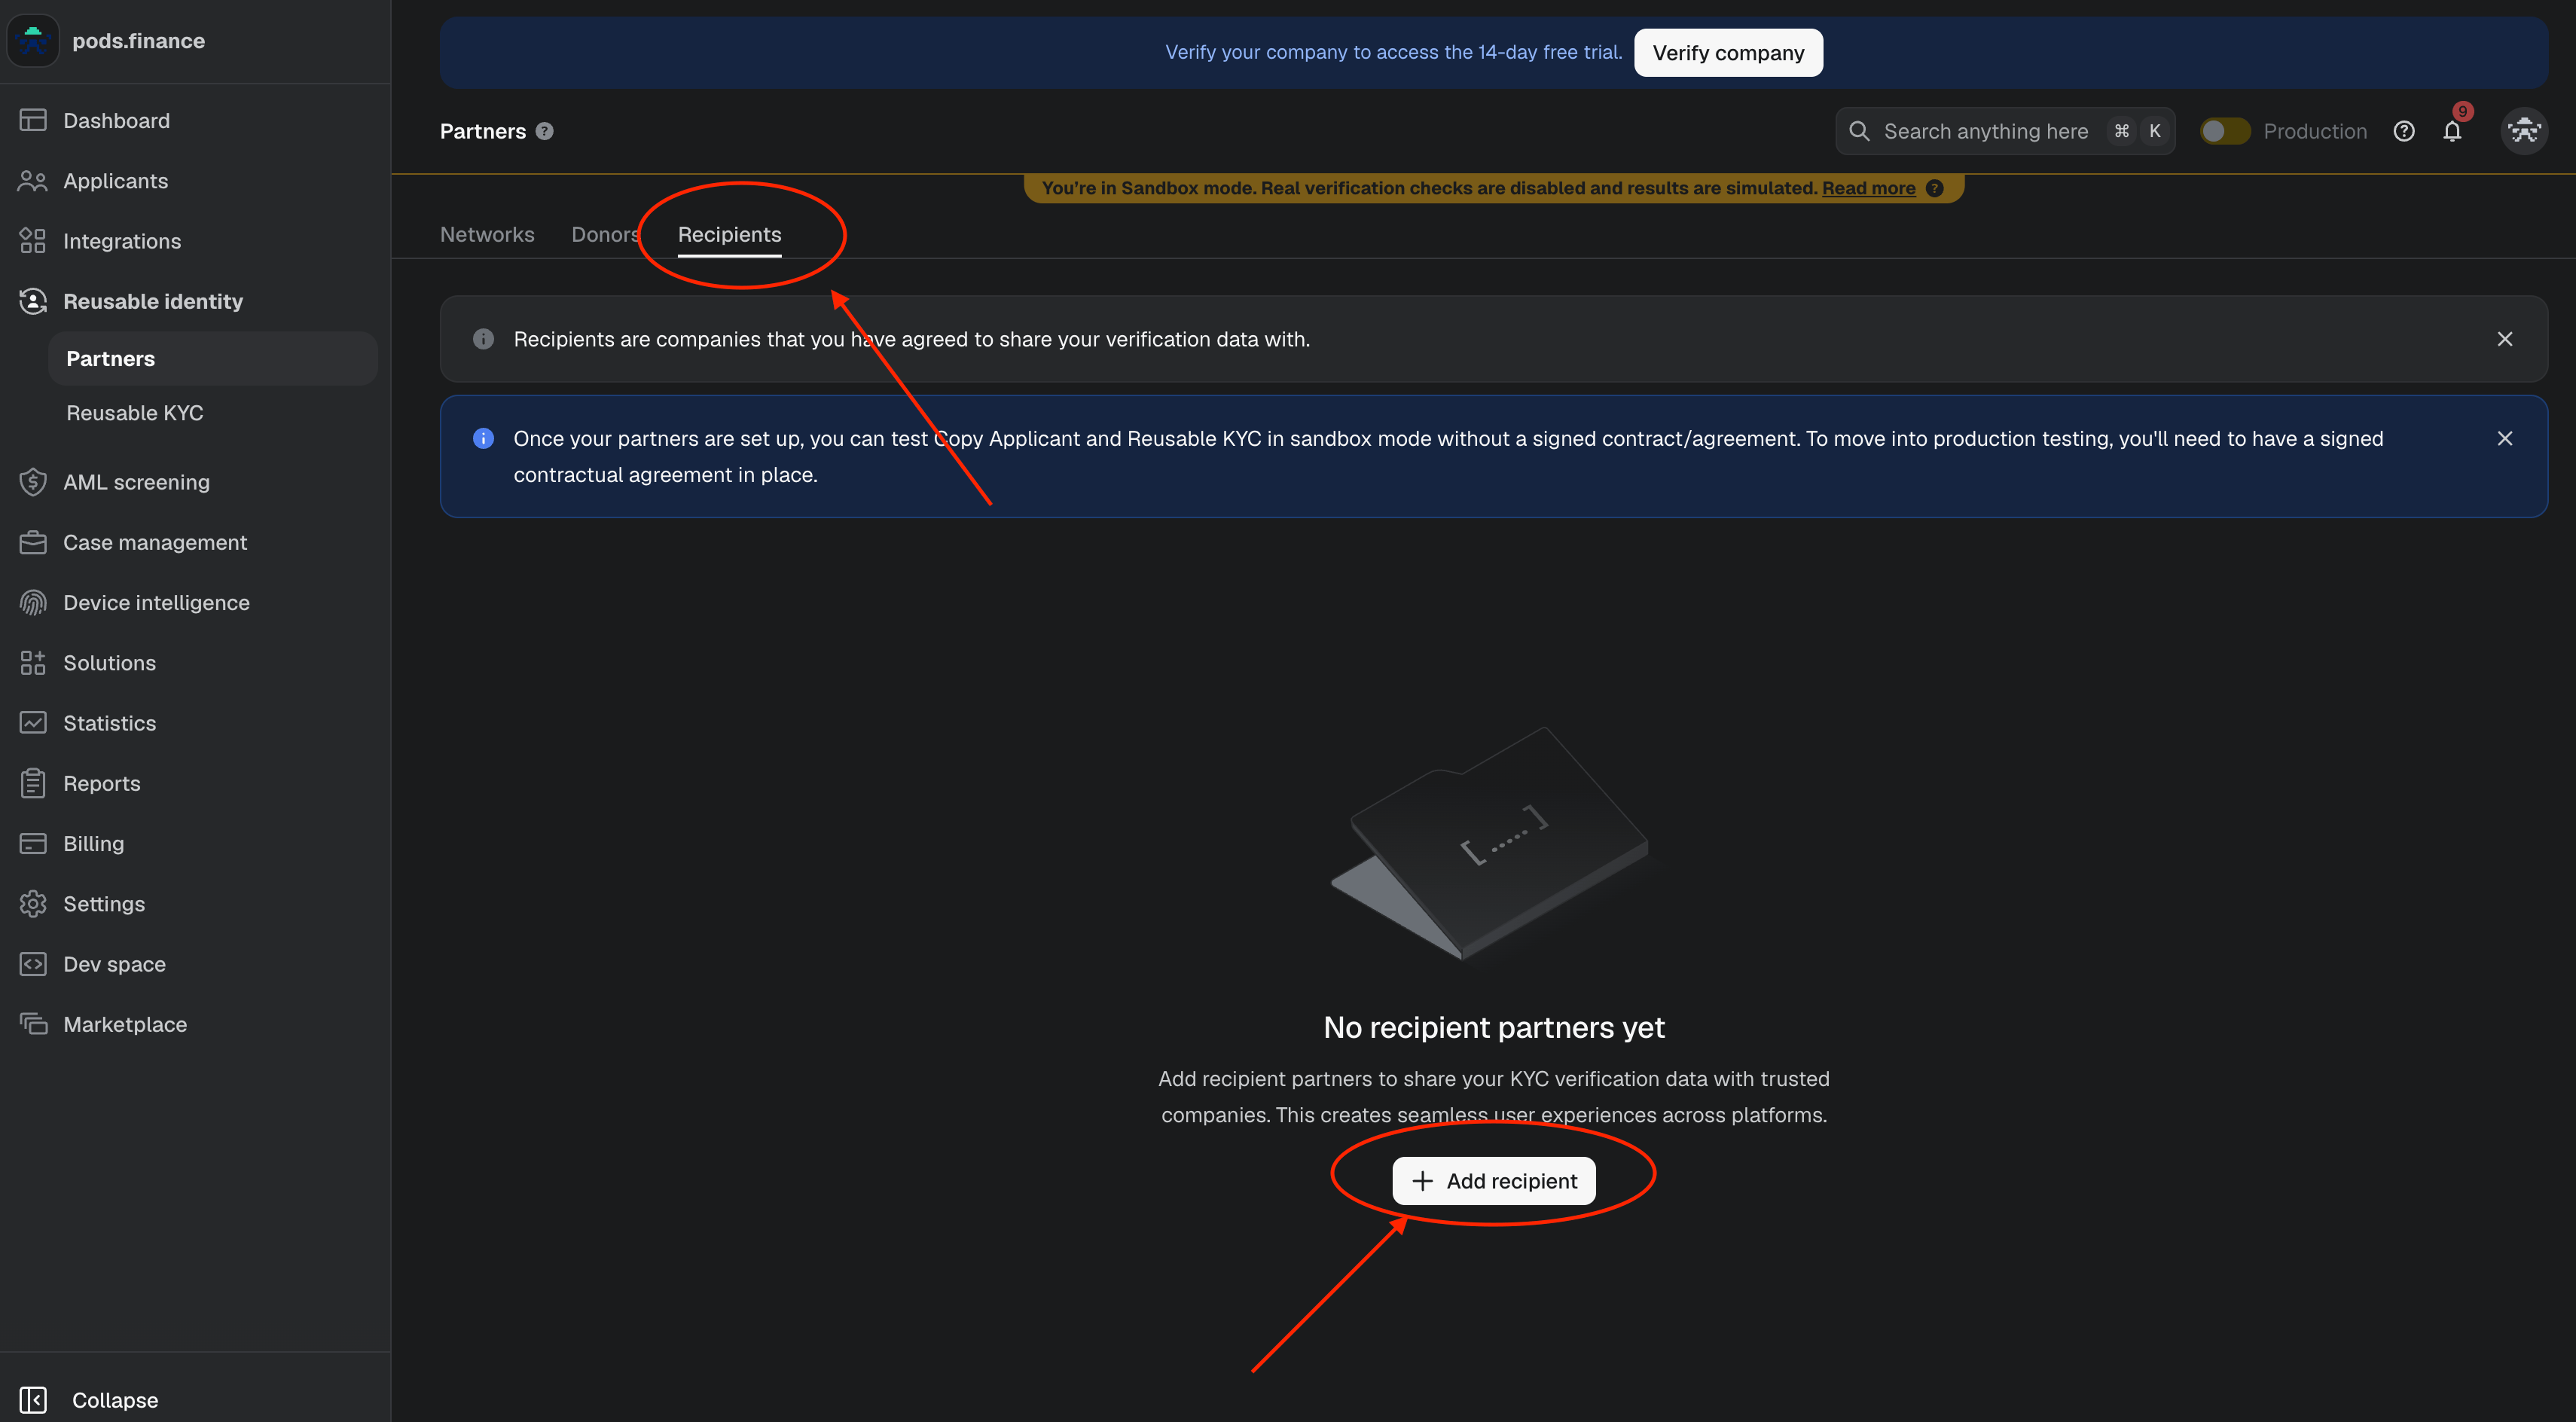
Before generating reusable KYC share tokens, add the local KYC/AML provider as a recipient in Sumsub.- Go to
Reusable identity->Partners. - Open the
Recipientstab. - Click
Add recipient. - Enter the
PROVIDER_PARTNER_TOKENprovided by Pods. - Save the recipient setup.
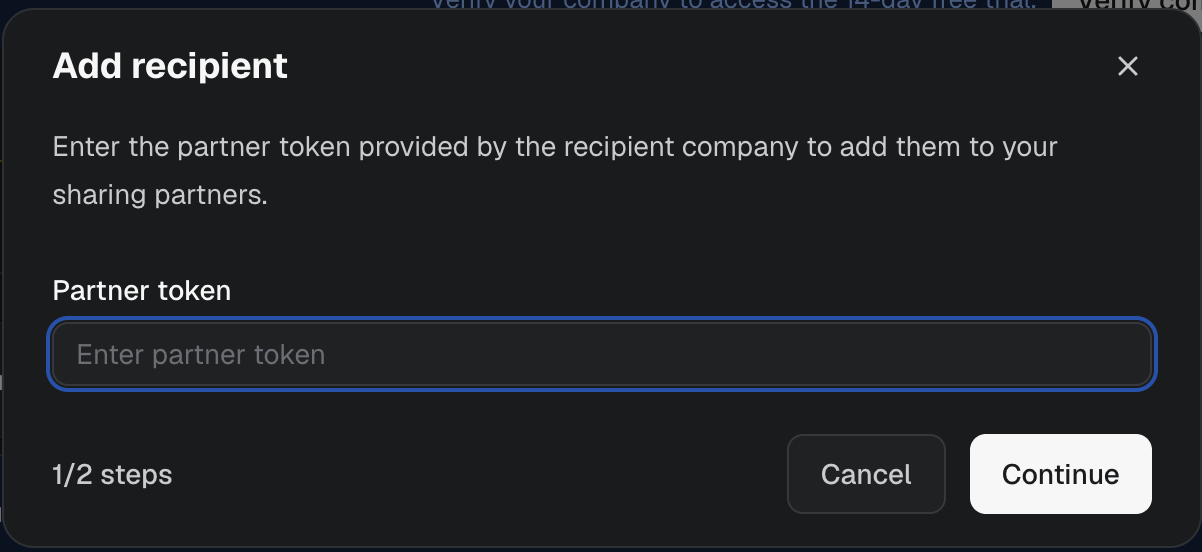
PROVIDER_FOR_CLIENT_ID from Pods when generating share tokens. This is the provider’s Sumsub recipient/client id. It is separate from the partner token and from your Pods API key.
Reference: Sumsub partner management.
3. Create a Sumsub app token
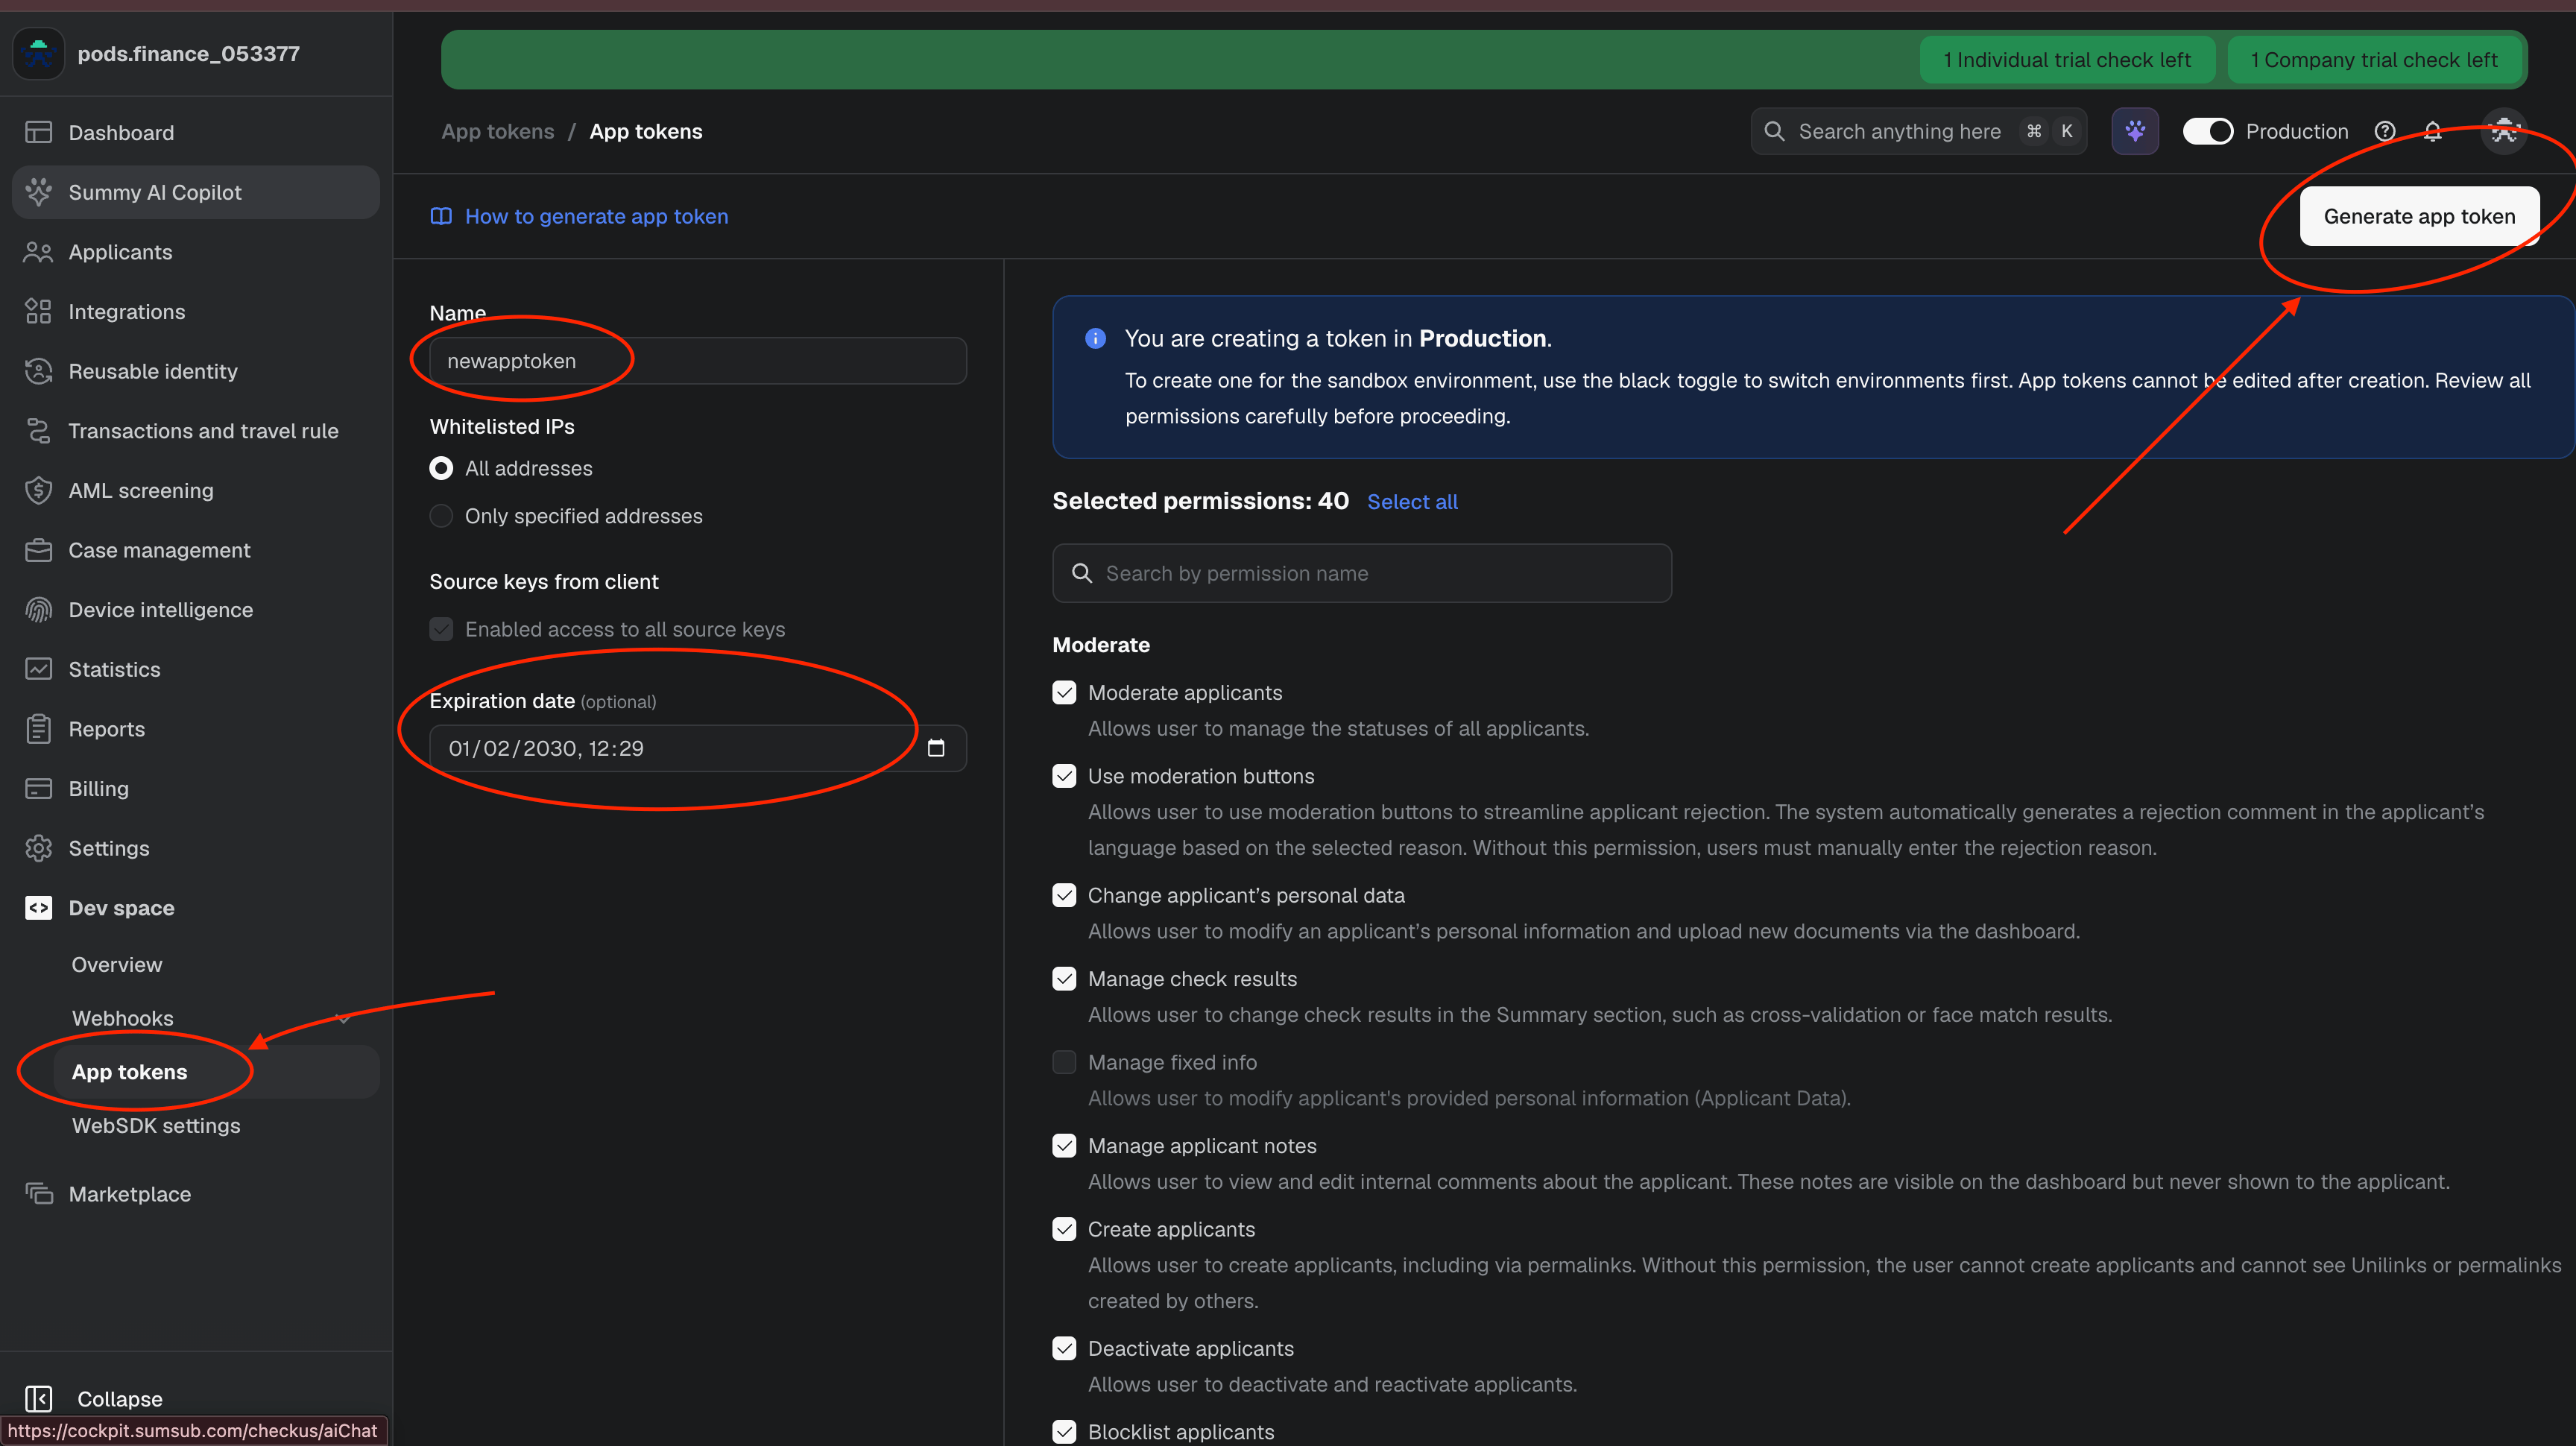
Create the Sumsub app token after Reusable Identity is enabled and after the local provider is added as a recipient. This order matters because the token must include permission to share applicant data.- Open Sumsub Dashboard.
- Go to
Dev space->App tokens. - Create a new app token.
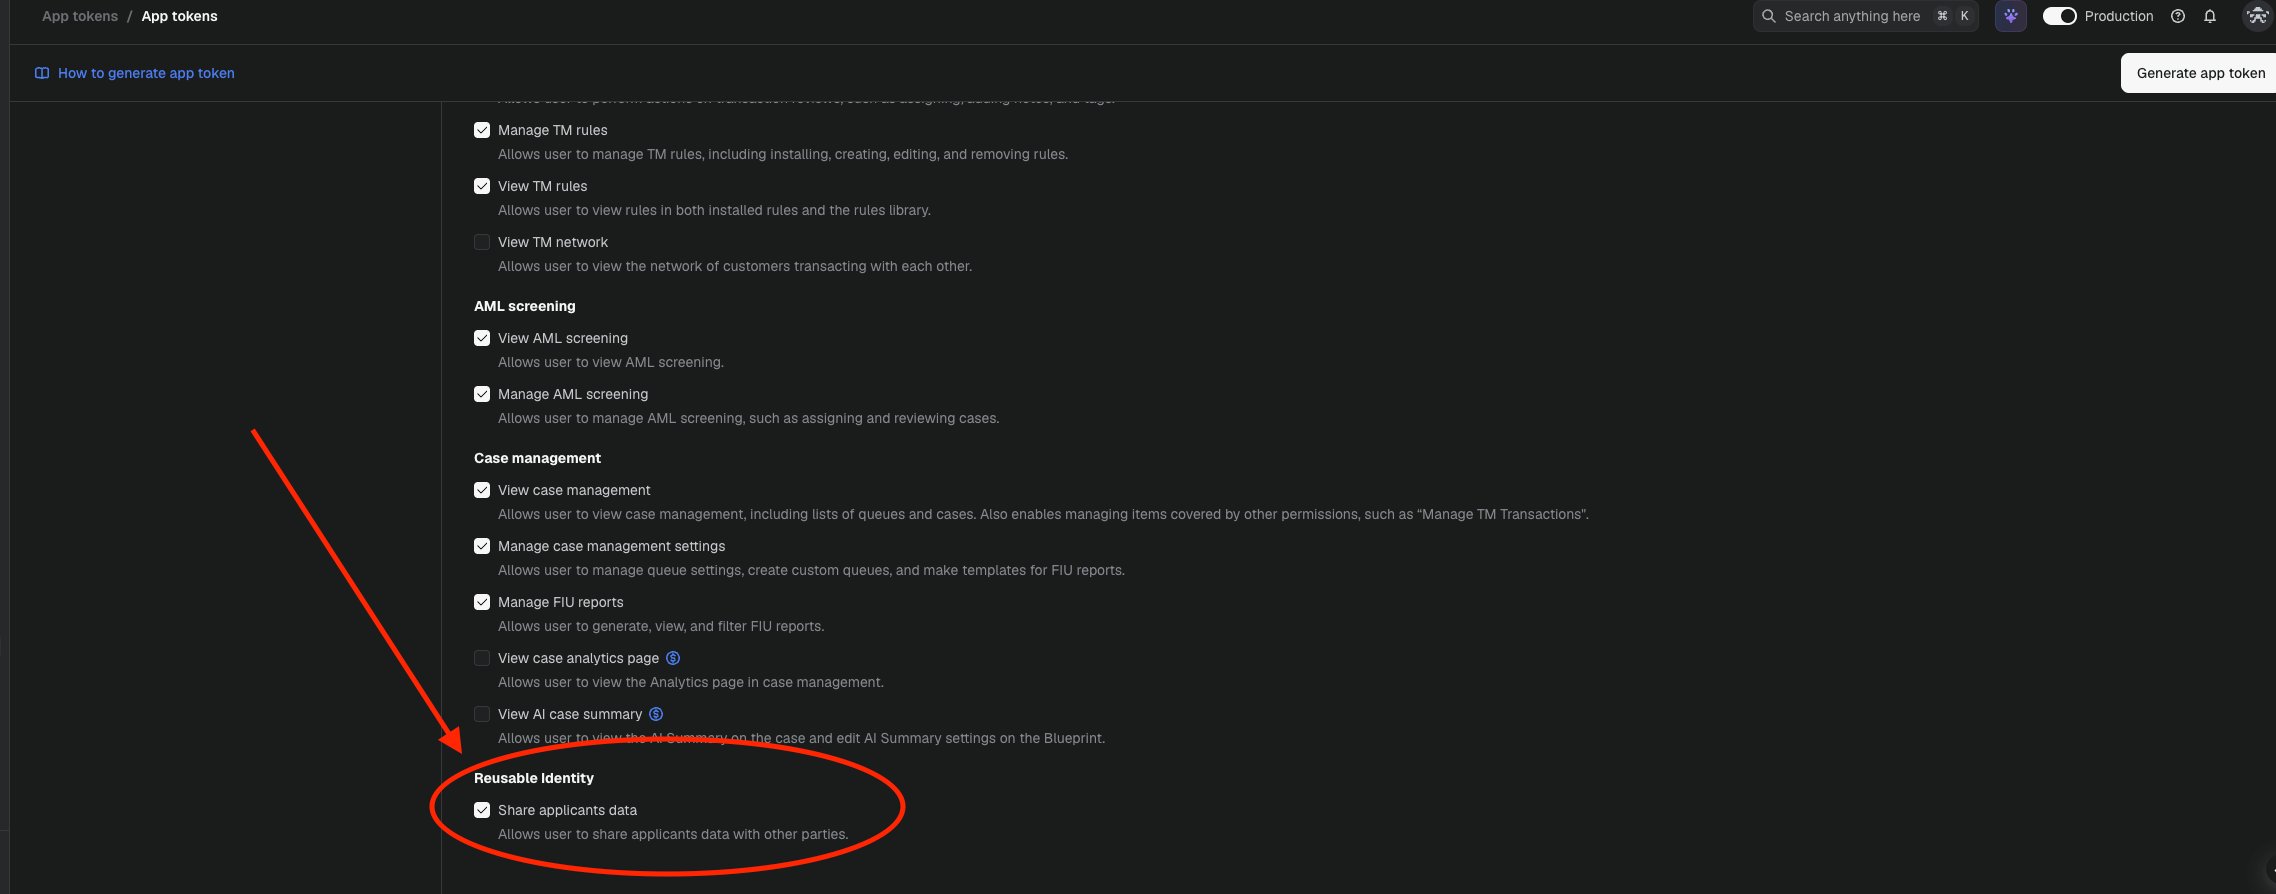
- Ensure
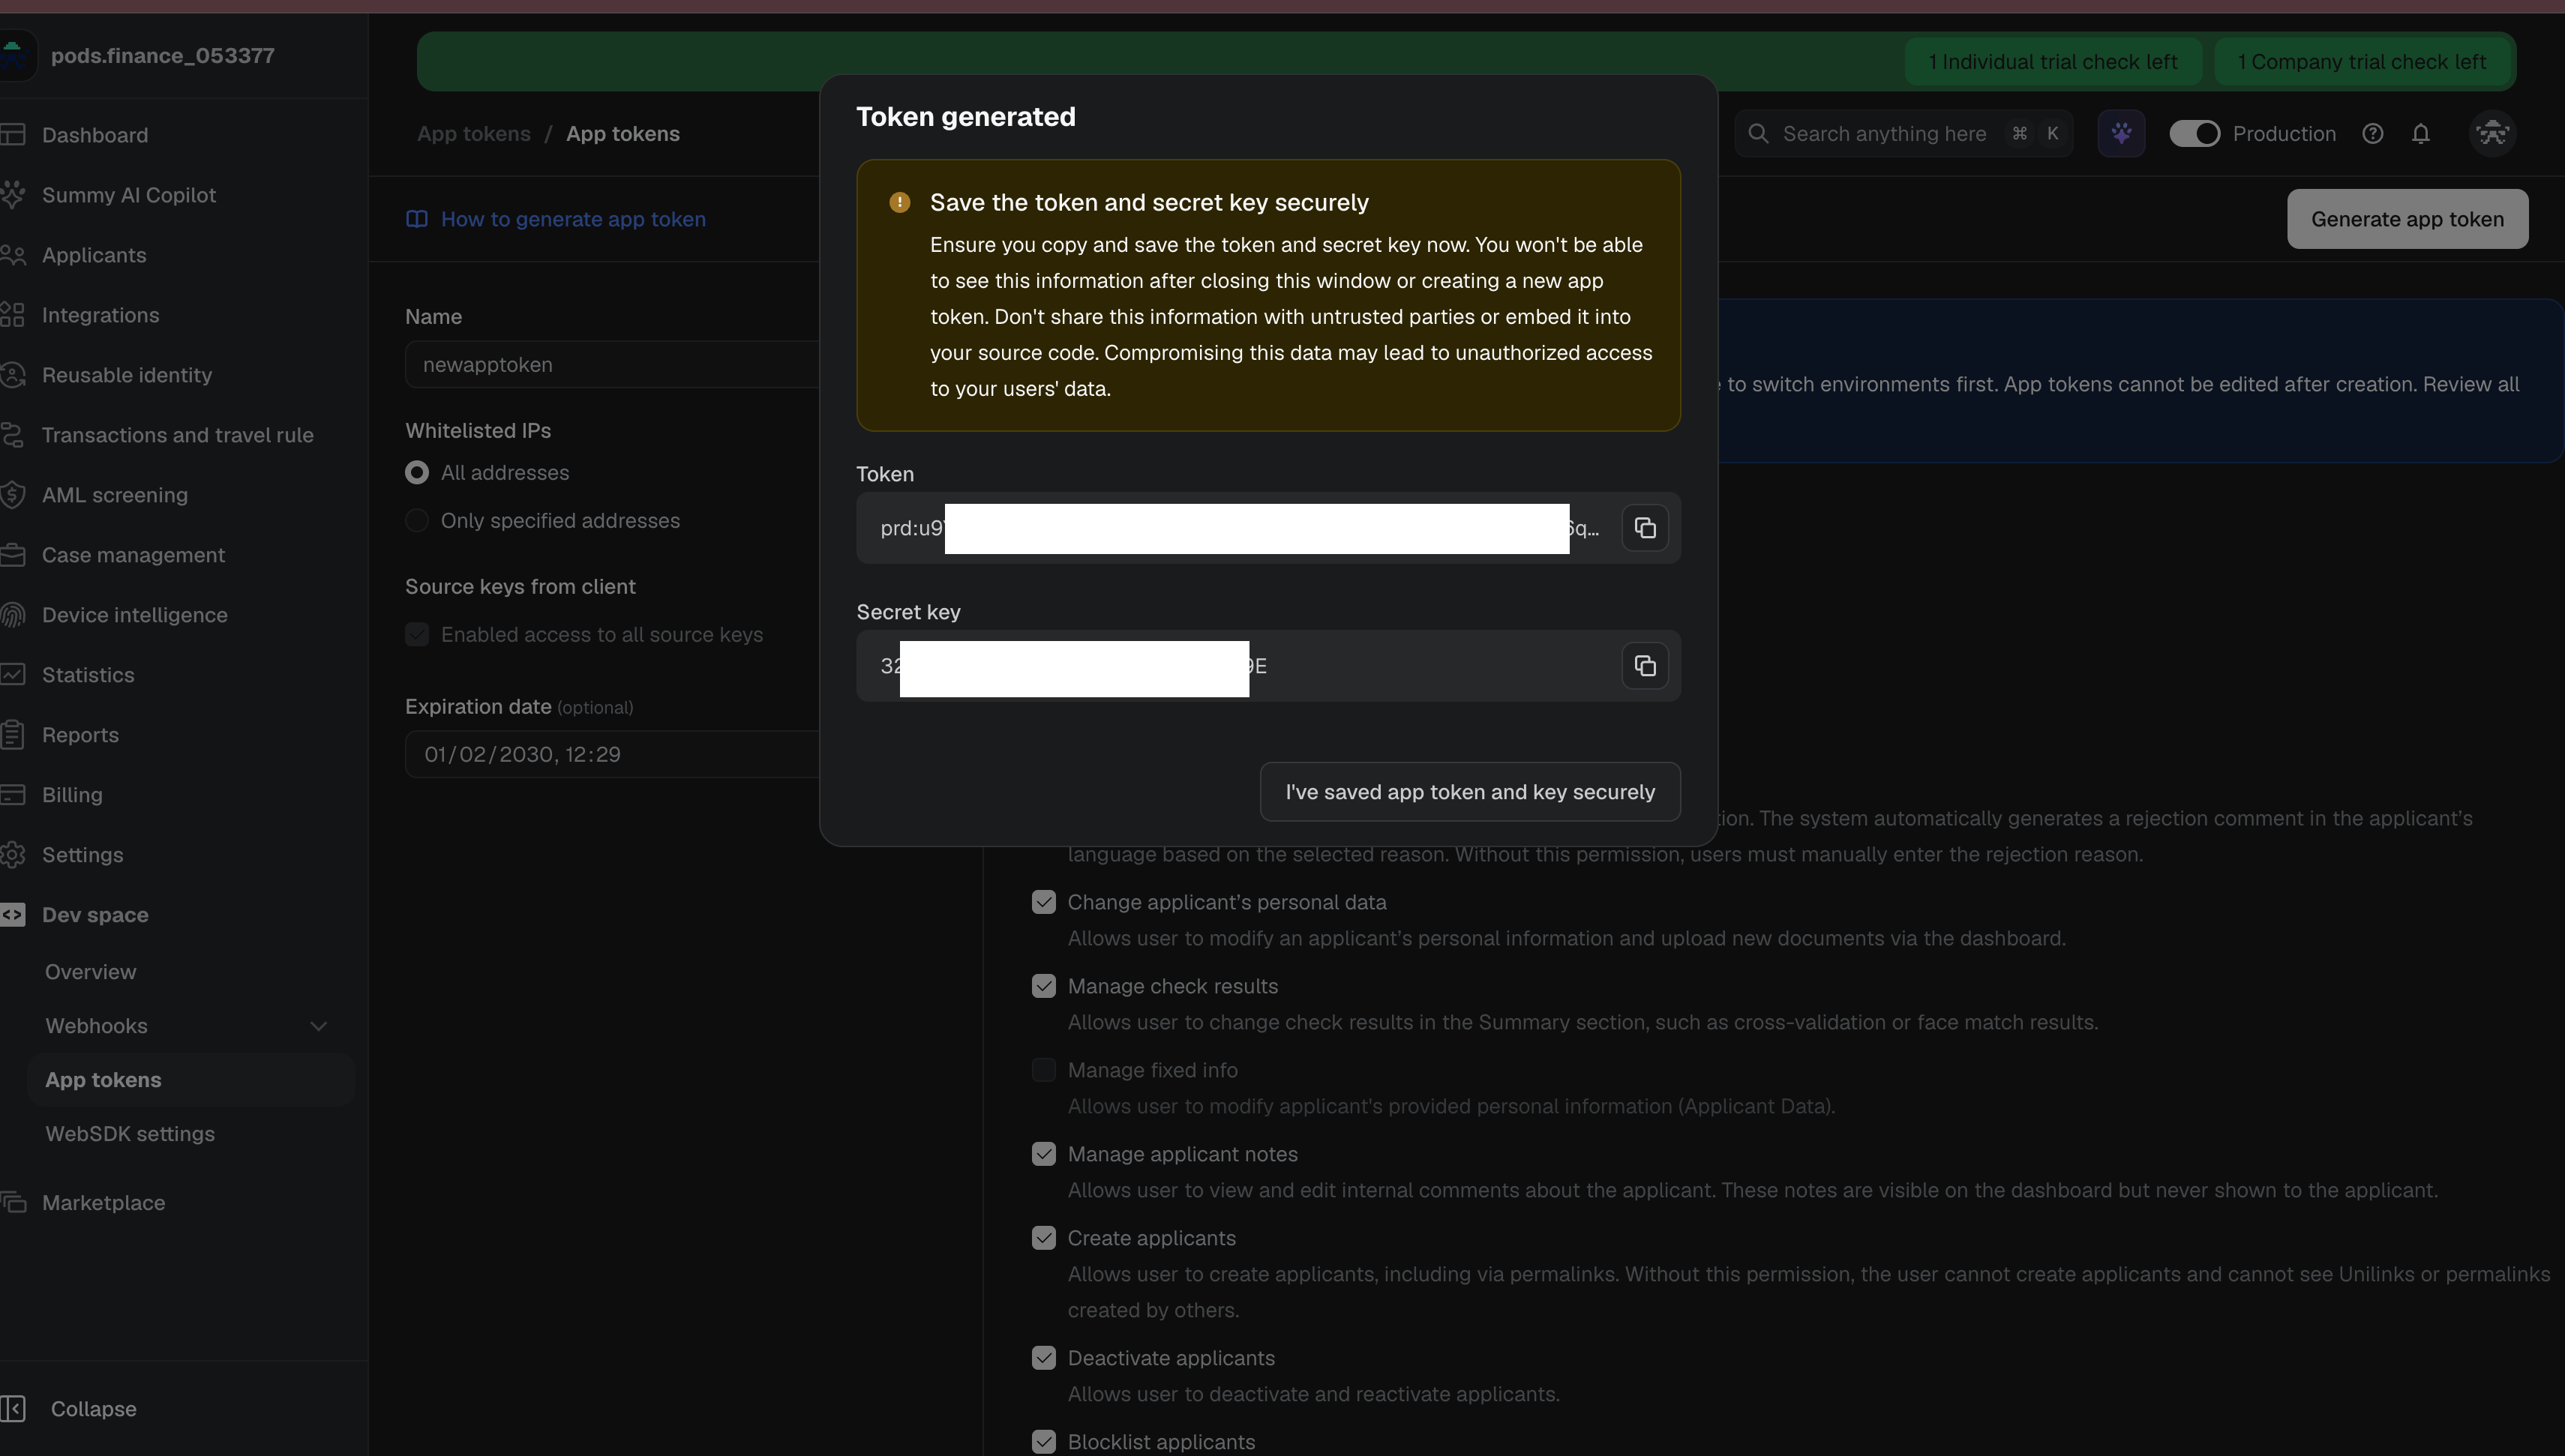
Reusable Identity->Share applicants datais selected. - Save the token and secret key securely. Sumsub only shows the secret once.
A valid app token still requires active Sumsub credits/license. If Sumsub returns
license-key-exhausted or Not enough credit, ask Sumsub to enable credits for the target environment.4. Run WebSDK and confirm approval
Use your backend to create a Sumsub WebSDK access token for the applicant and mount WebSDK in your application. Use the samepods-ramp-level level name configured above.
Your backend must only continue to Pods after Sumsub reaches:
Reference:
5. Generate the Sumsub share token
After Sumsub returnscompleted + GREEN, your backend calls Sumsub to generate a fresh share token for that applicant and the local provider’s recipient.
PROVIDER_FOR_CLIENT_ID provided by Pods. Generate a fresh shareToken for each approved applicant import. Sumsub share tokens are short-lived and invalidated after usage.
Response:
6. Submit the share token to Pods
Send the fresh token from your backend to Pods. Pods does not store the share token. Pods validates the submitted tax id and searches its profiles for an approved identity with the same salted tax-id hash. When the local provider still reports the identity as approved, Pods creates a separate profile for your customer, reuses the approved identity, and returnsapproved without consuming the fresh token. Pods stores only the salted hash and the last four digits, never the raw tax id.
If no approved identity can be revalidated, Pods creates or reuses the customer profile and internal subaccount with the local provider, then imports the fresh share token normally. If the provider reports that the token was already imported into that subaccount, Pods checks that subaccount for an existing approved attempt before adopting it.
Pods generates the public
kycUserId and returns it in the response. Store this id in your backend and use it for future status checks.
Successful response:
sumsubApplicantId, Pods returns the same customer-scoped profile instead of creating a duplicate. The tax id must remain the same; a conflicting tax id returns 409 SUMSUB_CPF_MISMATCH. An immediate approved response means the local provider revalidated an existing approved identity for the tax id. A provider_pending response means the provider accepted a new import for processing; approval is only final after the status endpoint returns approved. See Track Pods Ramp status to poll for that result, and Move money with Pods Ramp to use the resulting approval.